Lola Clean Freaks

Stash That Splash: How to Safely Store Cleaning Supplies

Stash That Splash: How to Safely Store Cleaning Supplies

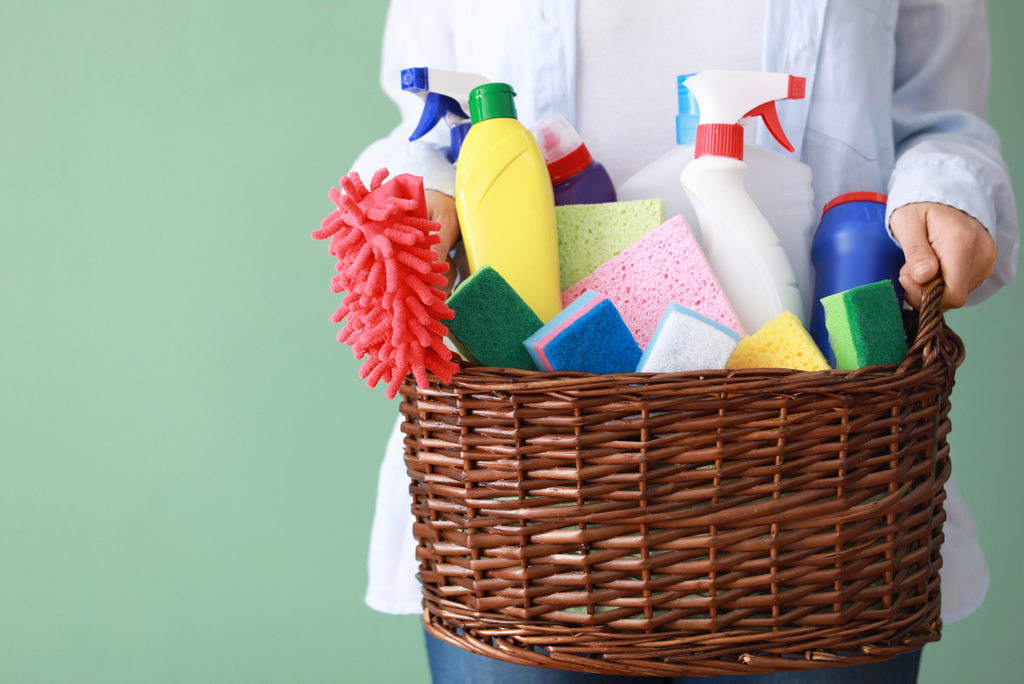
Cleaning supplies are like superheroes of the household, ready to battle against dust bunnies and kitchen messes. But, just like any superhero, they need a safe place to call home. We're here to spill the beans (or should we say, cleaning solutions) on how to safely store your cleaning supplies, so you can keep your space squeaky clean without any surprises.

Keep 'Em High and Dry

First things first, let's talk about where to store your cleaning arsenal. One of the cardinal rules is to keep your cleaning supplies high and dry. Bathrooms might seem like an ideal spot, but the humidity can cause some cleaning products to go rogue and lose their superpowers. Instead, opt for a cool, dry cabinet or a pantry where they can chill like the cleaning champs they are.

Know Your Labels

It's like dating: you need to know what you're getting into. Cleaning supplies come with labels for a reason. Read those labels like they're the latest bestseller. Some products need to be kept away from direct sunlight or extreme temperatures, while others can't stand the heat of the kitchen. Be label-savvy, and your cleaning supplies will thank you with their long-lasting prowess.

Befriend the Bins

Ever seen those shiny storage bins and thought they were just for Pinterest-worthy homes? Think again! Bins are your cleaning supply sidekicks. They keep everything organized, and they make your supplies easy to find when you're in the middle of a cleaning frenzy. Plus, they add a touch of superhero glamour to your storage space.

Lock 'Em Up

If you've got little ones running around or curious pets with a knack for knocking things over, childproofing your cleaning supplies is a must. Invest in sturdy cabinets with locks or use safety latches to keep prying hands and paws away from your cleaning heroes. Safety first, cleanliness second!

Keep It Simple

You don't need a separate cleaning supply closet worthy of Marie Kondo to keep things in order. A simple shelf, a few labeled bins, and some hooks for brooms and mops can work wonders. Remember, the goal is to make your life easier, not to add more stress to it.

Down with the Clutter

Hey, we get it. Sometimes you're so eager to clean that you end up with a cluttered collection of half-empty bottles and random sponges. The rule of thumb is, if it's been there longer than you can remember, it's probably time to toss it. Less clutter, more cleaning power! Plus, it's an excuse to go shopping for some new, shiny cleaning products.

Safety First

Cleaning supplies might not be kryptonite, but they can be harmful if not handled properly. Always store them out of reach of children and pets, and make sure the lids are tightly closed. If you're storing chemicals, keep them separate from other supplies to prevent accidental mixing. And remember, when cleaning, always read and follow the instructions on the label for safe and effective use.

Rotate Stock

Cleaning supplies don't last forever. Like superheroes, they have an expiration date. Regularly check your stash for expired or dried-up products and replace them with fresh ones. You want your cleaning team to be at peak performance when you call them into action.

So there you have it, folks! With these tips, you'll be the superhero of household cleanliness, and your cleaning supplies will be your trusty sidekicks. Keep them safe, organized, and ready for action, and you'll have a clean and sparkling home in no time. 

Say Goodbye to Move-Out Mayhem: Your Apartment Cleaning Checklist for a Stress-Free Farewell

Say Goodbye to Move-Out Mayhem: Your Apartment Cleaning Checklist for a Stress-Free Farewell

Moving out of an apartment is like that bittersweet moment when you finish binge-watching your favorite TV series – you're excited for what's next, but there's a twinge of nostalgia. And just like how you can't leave your TV room in disarray, you shouldn't bid adieu to your apartment without a proper cleanup. Fear not, because we've got your back with an Apartment Cleaning Checklist that'll turn move-out day into a breeze!

Gather Your Cleaning Arsenal

Before you embark on your cleaning adventure, assemble your cleaning supplies. We're talking about the classics here: Angle Broom with Dustpan, The Revolution Microfiber Spin Mop, vacuum,  Jumbo Microfiber Cloths, Wowables® reusable cleaning cloth, trash bags, and rubber gloves. Remember, a well-prepared warrior is a victorious warrior.

Declutter Like a Pro

Begin your mission by decluttering. Sort your stuff into three categories: keep, toss, and donate. Let's be real, those three-year-old magazines aren't making the cut. Toss 'em!

The Dust Bunnies' Worst Nightmare

Now that you've lightened the load, it's time to unleash your inner dust warrior. Dust all surfaces using 360° Extender Duster Kit from the ceiling to the floor. Don't forget the often-neglected spots like ceiling fans, baseboards, and those pesky window sills.

Wipe It Down

Grab that Jumbo Microfiber Cloths and wipe down every surface. Countertops, appliances, cabinets – give them all some TLC. This step will leave your apartment smelling fresh and looking sparkling.

Shine Up Your Appliances

Your appliances have been working hard for you. Reward them with a good cleaning. Scrub the oven with a Wonder Scourerâ„¢ Non Scratch pad and wipe microwave then the fridge with a Jumbo Microfiber Cloths. Empty and defrost the freezer, and clean the coils behind the fridge for bonus points.

Master the Art of Bathroom Bliss

The bathroom can be a battleground, but with the right approach, it'll be a piece of cake. Clean  the toilet with 500 Brushes. Scrub sink, and tub or shower with Large Scrub Brush. Replace the shower curtain liner if it's seen better days. Don't forget to clean the mirror, too – you want to leave your reflection looking fabulous!

Floor Finale

Time to tackle the floors. Using 6 in One Snap in Cleaning Kit, sweep all the rooms, and then mop the floors for that final shine. Use appropriate cleaners for different floor types – you don't want to turn your hardwood into a slip 'n slide.

Windows to the World

Let the sunshine in! Clean your windows, inside and out if possible. You'll be amazed at how much brighter your place looks once those streaks are gone.

Light Fixtures & Switch Plates

Brighten up your place by cleaning light fixtures and switch plates. Replace any burnt-out bulbs – a well-lit space looks bigger and more inviting.

Don't Forget the Nooks and Crannies

Remember to check those often overlooked spots like behind the fridge and stove, inside closets, and under the furniture. You never know what treasures (or dust bunnies) you might find.

Bid Farewell to the Trash

Dispose of all your trash properly. Take out the garbage and recycling, and don't leave anything behind. The last thing you want is a call from your former landlord about a lingering trash scent.

Check for Repairs

Before locking up for good, do a final walkthrough. Look for any minor repairs that need attention – a loose doorknob, a scuffed wall – and take care of them. You want to leave on the best terms possible.

Document Your Cleanliness

Take photos to document the cleanliness of your apartment. This can serve as evidence if there are any disputes with your landlord regarding your security deposit.

You'll leave your apartment in tip-top shape, and the next tenant will thank you for it. Plus, who knows, maybe you'll find a hidden treasure or two along the way. So, put on your favorite cleaning tunes, grab your trusty cleaning supplies, and let's make moving out a breeze – it's time to say goodbye to your apartment in style!

Steam Cleaning 101: What You Need to Know Before You Turn Up the Heat

Steam Cleaning 101: What You Need to Know Before You Turn Up the Heat

Picture this: you've just moved into a new apartment, and the place looks perfect except for one tiny detail—your floors are sporting some mysterious stains from the previous tenant's wild spaghetti nights. Or maybe you're a seasoned homeowner, and your trusty old couch has seen better days after one too many Netflix binges. What's your secret weapon for tackling these messes? Enter steam cleaning, the unsung hero of household chores. But before you grab that steam wand and go all "cleaning wizard" on your dirtiest surfaces, lets delve into what you need to know.

Water + Heat = Magic

First things first, steam cleaning is like Harry Potter's wand for cleaning enthusiasts. It combines two simple ingredients: water and heat, creating a magical potion that can obliterate dirt, grime, and even those stubborn tomato sauce stains. The heat turns water into steam, which is then released through a nozzle or brush, blasting away dirt and bacteria in its path.

Know Your Machines

When it comes to steam cleaning, not all machines are created equal. There are various types and sizes to choose from, so it's essential to pick the right one for your needs. If you're tackling large areas, a full-size steam cleaner with a larger water tank is your best bet. For smaller jobs, handheld steam cleaners are nifty little tools that get the job done. Just remember, size matters!

Safety First

Now, before you get too steamy with your cleaning, let's talk safety. Steam is hot stuff, so always wear protective gear like gloves and safety goggles to shield yourself from potential burns. And for the love of clean, don't steam clean your pet! Fido might not appreciate being turned into a fluffy cloud.

Prep Your Space

Before you unleash the steamy fury, prepare your space like a boss. Remove any loose dirt and debris, vacuum the area to get rid of larger particles, and clear the path of any obstacles. You don't want to be that person who steam cleans over a Lego minefield!

It's Not for Everything

While steam cleaning is a champ at tackling many surfaces, it's not a jack-of-all-trades. Avoid using it on sensitive materials like unsealed hardwood floors, silk, and some delicate upholstery. Trust us; you don't want to turn your precious silk pillow into a wrinkled mess.

Watch the Clock

Timing is everything in life, and steam cleaning is no exception. Be mindful of how long you hold the steam wand in one spot, especially on delicate surfaces. Too much heat in one place can lead to unwanted consequences, like warping wood or fading colors. Keep it moving, folks!

Mind the Environment

One of the coolest things about steam cleaning is that it's eco-friendly. You're not dumping harsh chemicals down the drain or releasing them into the air. Steam cleaning is like Mother Nature's way of giving you a high-five for being environmentally conscious. So, steam away guilt-free!

The Power of Patience

Steam cleaning is not a "one and done" affair. It may take a few passes to get that stubborn stain out, so be patient and persistent. Rome wasn't steam-cleaned in a day!

Say Goodbye to Germs

If you're a germaphobe, you'll love this part. Steam cleaning not only gets rid of visible dirt but also zaps away bacteria and allergens lurking beneath the surface. Say hello to a cleaner, healthier home!

Maintenance Matters

Your steam cleaner is your cleaning sidekick, so treat it right. Clean the machine regularly, empty the water tank after each use, and follow the manufacturer's maintenance instructions. Neglecting your machine is like leaving Batman in the Batcave with a dead battery—it won't save Gotham!

A World of Possibilities

Now that you're armed with the knowledge of steam cleaning, you can tackle a world of cleaning challenges with confidence. Whether it's your floors, your furniture, or even your oven, steam cleaning has your back. So, get out there and turn up the heat—the dirt doesn't stand a chance!

In the battle against grime, steam cleaning is your trusty lightsaber, your Excalibur, your magic wand. Armed with the right knowledge and a little bit of elbow grease (not too much, though, because steam does most of the work), you'll be well on your way to a cleaner, brighter, and happier home. So, go forth, steam warrior, and may your cleaning adventures be ever steamy and satisfying!

Clean Sweep: 5 Clever Hacks to Stretch the Life of Your Cleaning Products

Clean Sweep: 5 Clever Hacks to Stretch the Life of Your Cleaning Products

Let's face it, folks – cleaning is nobody's idea of a wild Saturday night. But hey, we all want our homes to look spick and span without constantly emptying our wallets on cleaning supplies. So, why not master the art of stretching your cleaning products a little further? It's not just about saving money; it's about being a household superhero. Grab your capes (or aprons), folks, because we've got five fantastic tricks to make those cleaning products last longer and leave your home sparkling!

Dilute to Dominate

When it comes to cleaning products, a little goes a long way. Imagine your cleaner as a superhero who can fly but only sips on energy drinks when absolutely necessary. That's right – dilute that cleaning solution! Most household cleaners can be diluted with water, and you'll still get the same cleaning power without emptying the bottle in one go.

Grab an empty spray bottle, pour in your cleaning solution, and add water. The magic ratio? One part cleaner to three parts water should do the trick. Now, you've just turned one bottle of cleaner into three! Not only are you saving money, but you're also saving the planet by using fewer plastic bottles.

Unleash the power of Microfiber Cleaning Cloths

Okay, maybe not actual diapers, but let's talk about cleaning cloths. Those disposable cleaning wipes are convenient, but they tend to disappear faster than your last slice of pizza at a party. Instead, invest in reusable cleaning Jumbo Microfiber Cloths. These little marvels can be washed and used over and over again.

Plus, they're like a magnet for dirt and grime, making cleaning a breeze. To make them last even longer, designate different cloths for various tasks. One for the kitchen, one for the bathroom, and one for that mysterious dust colony behind the couch. Just toss them in the washer when they're dirty, and you're good to go.

Be a Spray Master

Ever watched a movie where the hero is trying to defeat the villain, and they start using their superpowers sparingly to conserve energy? Well, think of your cleaning products as superheroes too. Instead of spraying your cleaner directly onto surfaces, spritz it onto an Anti Microbial Clean N’ Wipe Cloth first. This way, you'll use less product while getting the same sparkling results.

Remember, it's all about control and finesse. You wouldn't use a fire hose to water your garden, would you? No, you'd use a gentle sprinkler. The same principle applies here – gentle spritzing equals a longer-lasting cleaning product.

Soak Up the Savings

For those stubborn stains and crusty messes that just won't budge, don't resort to pouring half the bottle of cleaner on them. Instead, give them a good soaking. Fill your sink or a bucket with warm water, add a small amount of cleaning solution, and let your dirty dishes, stained clothes, or grimy surfaces soak for a bit.

This method works wonders because it breaks down the dirt and grime, making it easier to clean with less product. So, next time you're faced with a cleaning conundrum, remember to soak up the savings – both in terms of cleaning product and elbow grease!

Love Your Tools

Last but not least, take care of your cleaning tools. Whether it's a mop, broom, or vacuum cleaner, proper maintenance can make them last longer, which, in turn, means you'll use fewer cleaning products. Clean your mop heads and brushes regularly, replace worn-out parts, and store your tools in a dry, clean place.

And don't forget about your trusty vacuum cleaner! Empty the dustbin, clean the filters, and give it a good once-over. A well-maintained vacuum will pick up more dirt in one pass, reducing the need for repeat cleanings.

There you have it, folks – five sneaky hacks to make your cleaning products last longer and save you money. Who said cleaning can't be fun and frugal? So, put on your cleaning cape, grab your diluted spray bottle, and get ready to conquer the mess while leaving your bank account and the planet in better shape.

Popcorn Ceilings: How to Clean Without Popping Your Sanity

Popcorn Ceilings: How to Clean Without Popping Your Sanity

Ah, the infamous popcorn ceiling! That quirky, textured wonder that graces the ceilings of countless homes, adding a dash of vintage charm. But here's the catch – it's also a dust magnet. Cleaning it can seem like a Herculean task, and if done wrong, you might end up with more mess than you started with. Fear not, though, because we're about to unleash some popcorn ceiling cleaning wisdom that'll leave your ceilings looking fabulous without making your home feel like a popcorn explosion aftermath.

Suit Up, Popcorn Style!

Before you embark on your popcorn ceiling cleaning adventure, it's essential to dress appropriately for the occasion. Imagine you're going on a safari, but instead of lions and tigers, you're hunting dust and grime. Popcorn ceilings are notorious for shedding their texture, so don your best dust-proof attire. A pair of safety goggles, a dust mask, and a stylish hat (optional but recommended for maximum safari vibes) will do the trick.

Softly, Softly: Brush Away the Cobwebs

First things first, you'll want to gently remove any visible cobwebs or dust bunnies clinging to your textured ceiling. Grab a 360° Extender Duster Kit and give your ceiling a good sweep. Think of it as giving your ceiling a spa day; it deserves to be pampered too!

Spongebob Would Approve: Grab a Sponge Mop

Now that you've swept away the surface cobwebs, it's time to tackle the deeper dirt. Fill a bucket with warm, soapy water – nothing too fancy, just a dash of your favorite cleaning solution will do. Use Squeezematic Sponge Mop, dip it into the soapy water, and start mopping your way across the ceiling.

Gentle, even pressure is the name of the game here. Avoid going all 'Karate Kid' on your ceiling; you don't want to knock off any more popcorn texture than necessary. It's like cleaning a delicate piece of art – be the Mr. Miyagi of ceiling cleaning!

Rinse and Repeat: The Double-Dip Method

Once you've successfully given your ceiling a sponge bath, it's time to rinse away the soap residue. Fill another bucket with clean water and rinse out your sponge mop. Now, gently mop the ceiling again with the clean, damp Squeezematic Sponge Mop to remove any soap residue.

Think of it as rinsing shampoo from your hair – only a lot less likely to end in a slip-and-fall situation. Rinse thoroughly to ensure your popcorn ceiling looks its best when it dries.

Wowables® to the Rescue: The Final Polish

To truly make your popcorn ceiling shine (figuratively, of course), grab a roll of reusable Wowables®. Gently pat the ceiling dry, starting from one end and working your way to the other. Don't rub or scrub, just lightly pat away any remaining moisture.

This step is like the grand finale of a fireworks show – it adds that extra sparkle and leaves you feeling accomplished.

Congratulations! You've successfully cleaned your popcorn ceiling without turning it into a popcorn battlefield. But how can you prevent this mess from happening again? Consider these tips:

  • Limit excessive moisture: Popcorn ceilings don't like moisture, so keep the room well-ventilated to prevent mold growth.
  • Don't overload the paint: If you decide to paint your popcorn ceiling, avoid using heavy coats as this can cause the texture to sag or peel.
  • Use a soft touch: Be cautious when moving furniture or performing repairs near the ceiling to avoid accidental popcorn damage.

And there you have it, a cleaner, happier popcorn ceiling, and a living room that doesn't look like a dust storm just passed through. So, next time you invite friends over for movie night, they can enjoy your popcorn without wondering if it came from the ceiling! Happy cleaning! 

Spark Joy: The 7-Day Decluttering Guide to Achieve a Cleaner and Happier Home

Spark Joy: The 7-Day Decluttering Guide to Achieve a Cleaner and Happier Home

Is your home starting to feel like a labyrinth of clutter and chaos? Don't worry; you're not alone. We all accumulate items over time, and before we know it, our living spaces become overrun with stuff. But fear not! With a bit of dedication and a well-structured plan, you can declutter your way to a cleaner, more organized, and happier home. In this 7-day decluttering guide, we will walk you through step-by-step, helping you transform your living space into a place of peace and joy.

Day 1: Set Your Intentions

The first step in any decluttering journey is to set your intentions. Take a moment to visualize the home you want to live in—a space that is tidy, functional, and conducive to your well-being. Write down your goals, and be specific about the areas you want to declutter. Whether it's tackling the overflowing closet or the chaotic kitchen cabinets, having a clear plan will keep you focused and motivated throughout the process.

Day 2: Start Small

Decluttering can be overwhelming, especially if you have a lot of stuff. To avoid burnout, start with a small and manageable area. It could be a single drawer, dusting a shelf with 360° Duster Kit, mopping floor with The Revolution Microfiber Spin Mop, wiping surfaces with a Jumbo Microfiber Cloth or a small section of your closet. Sort through the items, and create three piles: Keep, Donate/Sell, and Discard. Be honest with yourself and let go of things you no longer use or cherish.

Day 3: Tackle the Paper Clutter

One of the biggest sources of clutter in many homes is paper—old bills, receipts, junk mail, and more. Spend the third day organizing your paperwork. Invest in folders or a filing system to keep important documents together. Shred or recycle papers you don't need, and unsubscribe from unnecessary mailing lists to prevent future clutter.

Day 4: Embrace Minimalism

On day four, challenge yourself to embrace minimalism. Identify five items you can live without. Minimalism isn't about living with nothing; it's about surrounding yourself with things that bring value and joy into your life. Donate or sell these items, and feel the liberating sense of letting go.

Day 5: The Sentimental Showdown

Dealing with sentimental items can be emotionally draining, but it's an essential part of the decluttering process. On day five, go through your sentimental items and keep only those that truly hold special meaning. Consider taking pictures of certain items to preserve the memories without the physical clutter. Create a memory box for the most cherished keepsakes.

Day 6: Digital Declutter

A clean home also involves a clutter-free digital space. Spend day six decluttering your digital life. Organize files on your computer, delete old emails, and declutter your smartphone. Unfollow social media accounts that no longer inspire or serve you. A clear digital space can significantly reduce mental clutter and improve productivity.

Day 7: Maintain the Order

Congratulations! You've successfully completed the 7-day decluttering journey. Now, the key is to maintain the order you've achieved. Create a daily or weekly routine to keep your home clutter-free. Make it a habit to put things back in their designated places, and be mindful of new items you bring into your home.

Decluttering your home is a transformative process that goes beyond a tidier living space. It helps you let go of the unnecessary, make room for what truly matters, and creates a sense of calm and contentment. By following this 7-day decluttering guide, you can pave the way to a cleaner and happier home, where you can focus on what truly sparks joy in your life. Remember, it's not about perfection but progress. Take it one step at a time, and enjoy the rewarding journey to a clutter-free life.

The Essential Guide: Unlocking the Secrets to Really Deep Cleaning Wooden Spoons

The Essential Guide: Unlocking the Secrets to Really Deep Cleaning Wooden Spoons

Wooden spoons have been trusted kitchen companions for centuries, offering a touch of rustic charm and natural beauty to our culinary adventures. While these timeless utensils boast numerous benefits, such as being gentle on cookware and not transferring heat, they require special care to ensure they stay in top-notch condition. Regular cleaning is essential, but every so often, giving them a thorough deep clean is crucial to maintain their longevity and prevent contamination. In this article, we'll reveal the secrets to really deep cleaning wooden spoons, so they continue to grace our kitchens with their functional elegance for generations to come.

Preparing the Wooden Spoons

Before diving into the deep cleaning process, gather all your wooden spoons and inspect them for any visible stains, discolorations, or cracks. Set aside those in need of repair or replacement and focus on the ones in good condition.

Soaking and Sanitizing

Submerge the wooden spoons in a mixture of warm water and mild dish soap. This step will help loosen food residue and grease, making them easier to clean. Allow the spoons to soak for about 15 to 30 minutes, depending on the level of grime.

Brushing Away Residue

After soaking, gently scrub the spoons with a soft-bristled brush like the Eco Clean Bamboo Scrub Brush to remove any remaining food particles and stubborn stains. Be cautious not to use abrasive cleaning pads or harsh chemicals that could damage the wood.

Tackling Tough Stains

For persistent stains or odors, create a paste using baking soda and water. Apply the paste to the affected areas and leave it on for 10 minutes before rinsing. Baking soda's natural abrasiveness will help lift the stains, leaving your wooden spoons fresh and clean.

Dealing with Lingering Odors

If your wooden spoons retain strong food odors, rub the surface with a halved lemon or white vinegar. The acidity will neutralize the smells effectively. Rinse the spoons thoroughly after the treatment.

Drying Properly

After deep cleaning, it's vital to dry the wooden spoons thoroughly. Use a clean, Jumbo Microfiber Cloth to remove excess moisture, and then air-dry them in an upright position. Avoid using a dishwasher or submerging the spoons in water for prolonged periods, as excessive moisture can lead to warping or cracking.

Conditioning for Longevity

To keep wooden spoons in top-notch condition, consider applying a food-grade mineral oil or beeswax regularly. These natural substances will hydrate the wood, prevent drying and cracking, and maintain their beautiful finish.

Wooden spoons are more than just kitchen utensils; they hold a special place in culinary history and our hearts. To ensure they remain dependable companions throughout the years, we must take the time to deep clean and care for them properly. By following the steps outlined in this guide, you'll unlock the secrets to preserving the beauty and functionality of your wooden spoons. Remember, with a little love and attention, these humble utensils will continue to add charm and practicality to your kitchen, enriching your cooking experiences and delighting generations to come.

Baking Soda Blitz: 5 Things You Should Never Clean with This Household Hero

Baking Soda Blitz: 5 Things You Should Never Clean with This Household Hero

Baking soda, a versatile and economical household staple, has earned its reputation as a go-to cleaning agent for tackling a myriad of domestic challenges. From deodorizing carpets to scrubbing grimy surfaces, it seems like there's nothing baking soda can't clean. However, there are certain items and surfaces that should never come into contact with this seemingly innocuous white powder. In this article, we uncover five things you should never clean with baking soda to avoid potential damage and disappointment.

Delicate Electronics and Gadgets

Your smartphone, tablet, laptop, and other electronic devices are the lifelines of your daily routine, and the last thing you want to do is harm them unintentionally. While baking soda might seem like a gentle abrasive, it can be abrasive enough to scratch delicate screens and surfaces. Additionally, baking soda's fine particles can seep into the crevices of your gadgets, causing malfunctions or damaging sensitive internal components. Instead, opt for Jumbo Microfiber Cloth and alcohol-based cleaning solutions specifically designed for electronics to ensure safe and effective cleaning.

Grease-Stained Clothing

When it comes to tackling tough stains like grease, baking soda may not be the best choice. While it can help neutralize odors, it lacks the grease-fighting power needed to remove stubborn oil-based stains from fabrics. If you try to clean grease-stained clothing with baking soda, you might find yourself with an even more challenging mess to deal with. Instead, reach for specialized laundry detergents formulated to combat grease and oil stains effectively.

Natural Stone Surfaces

Natural stone surfaces like granite, marble, and limestone grace many homes with their beauty and elegance. However, they require specific care to maintain their luster and longevity. Baking soda's abrasive nature can scratch and dull the surface of these stones, causing irreversible damage. Acidic substances, like vinegar, are also a no-go for cleaning natural stone surfaces. To keep these surfaces looking their best, stick to manufacturer-recommended stone cleaners or pH-neutral solutions designed explicitly for natural stone care.

Silverware and Silver Jewelry

While baking soda is often praised for its ability to shine silver, it can have adverse effects on your treasured silverware and jewelry. Over time, using baking soda for cleaning silver may lead to the removal of the thin layer of tarnish that protects the underlying metal. This can result in premature tarnishing and even corrosion of your prized silver possessions. To avoid these potential issues, choose dedicated silver cleaners or a soft, non-abrasive cloth to gently clean and polish your silver items.

Aluminium Cookware and Utensils

Baking soda is frequently used to clean and brighten kitchen surfaces, but it should not be used on aluminum cookware or utensils. The alkaline properties of baking soda can react with the metal, causing discoloration and pitting on the surface. Moreover, this reaction may also affect the taste and safety of the food prepared in these treated cookware items. Stick to appropriate cleaning methods recommended for aluminum, such as using mild dish soap, Wonder Scourerâ„¢ Non Scratch pad and warm water.

While baking soda is undoubtedly a versatile and useful cleaning agent, it is crucial to recognize its limitations. Certain delicate items and surfaces can be harmed by baking soda's abrasiveness and chemical properties. To ensure the longevity and beauty of your possessions, opt for alternative cleaning methods when necessary. Always check manufacturer guidelines and use appropriate cleaners to keep your valuables in pristine condition. By understanding the things you should never clean with baking soda, you can make more informed decisions about how to maintain a clean and well-kept home.

Sparkling Smiles, But Not for Everything: 5 Things to Avoid Cleaning with Toothpaste

Sparkling Smiles, But Not for Everything: 5 Things to Avoid Cleaning with Toothpaste

Toothpaste is a common household item known for its dental hygiene benefits. However, this versatile paste might not be as useful as you think when it comes to cleaning various items around the house. While it can leave your teeth sparkling, there are certain things you should avoid cleaning with toothpaste to prevent damage and disappointment. In this article, we'll explore five items you should never attempt to clean with toothpaste.

Electronic Devices

When your smartphone or tablet screen is smudged and grimy, you might be tempted to reach for toothpaste as a quick solution. However, using toothpaste on electronic devices is a big no-no. Toothpaste contains abrasive particles, which can scratch delicate screens and damage their protective coatings. Instead, opt for a Jumbo Microfiber Cloth or specially designed screen-cleaning solution to maintain the clarity and longevity of your electronic gadgets.

Jewelry

Your favorite silver necklace or precious gemstone ring deserves proper care, but toothpaste is not the answer. While it may initially remove tarnish from silver, the abrasives in toothpaste can leave microscopic scratches on metal surfaces and even dull gemstones over time. To clean your jewelry safely, use a jewelry cleaning solution or take it to a professional jeweler for expert care.

Car Interiors

You might have heard that toothpaste can be used to buff away scratches on car headlights, but this doesn't mean it's suitable for the entire car interior. Applying toothpaste to your dashboard or other surfaces can lead to discolored spots and damage the finish. Stick to automotive-approved cleaning products and Wowables® reusable cloths to maintain your car's interior in pristine condition.

Acrylic or Plastic Surfaces

Toothpaste should never be used on acrylic or plastic surfaces. The abrasives can cause fine scratches, making the material appear cloudy and less transparent. Whether it's eyeglasses, plastic furniture, or shower doors, stick to non-abrasive cleaners specifically formulated for plastic materials.

Carpets and Fabrics

Stains on carpets and fabrics are a common nuisance, but toothpaste is not the solution to your problem. Applying toothpaste to stains can leave behind a sticky residue that attracts dirt and can be challenging to remove entirely. Instead, use specialized carpet or fabric cleaners that target specific stains to avoid damaging the fibers and maintain the integrity of your carpets and fabrics.

While toothpaste is fantastic for maintaining oral health and a gleaming smile, it should be kept away from certain items around the house. From electronic devices to delicate jewelry, acrylic surfaces to car interiors, and carpets to fabrics, using toothpaste for cleaning can often do more harm than good. The abrasives in toothpaste may leave unsightly scratches, discoloration, and sticky residues, compromising the appearance and functionality of these items.

To avoid the disappointment of damaged possessions, always choose the right cleaning products suitable for the materials you are dealing with. Whether it's screen-cleaning solutions, jewelry cleaning agents, or fabric-specific stain removers, using the appropriate products will ensure your belongings stay in top-notch condition without any unintended side effects. So, next time you encounter a stain or a smudge, put the toothpaste tube back in the bathroom and reach for the correct cleaner instead!

Bye-Bye, Gnats! 8 Clever Tricks to Banish the Pesky Intruders from Your Home

Bye-Bye, Gnats! 8 Clever Tricks to Banish the Pesky Intruders from Your Home

Gnats, those tiny, flying nuisances, can turn a peaceful home into a frustrating battleground. These persistent pests seem to appear out of nowhere, hovering around your food, plants, and even your face. But fret not! In this article, we'll reveal eight effective ways to bid farewell to those bothersome gnats and restore tranquility to your living space.

Identify the Source

Before taking action, pinpoint the source of the gnat infestation. Overripe fruits, damp houseplants, or unattended trash are often their breeding grounds. Dispose of rotting produce, let your soil dry out between waterings, and secure your garbage cans to prevent gnats from multiplying.

Create DIY Traps

Simple and effective, DIY gnat traps can help you capture these tiny invaders. Fill a shallow dish with apple cider vinegar and add a few drops of dish soap. The sweet aroma of the vinegar lures gnats in, while the soap breaks the surface tension, causing them to drown.

Utilize Essential Oils

Harness the power of essential oils to drive gnats away. Citronella, eucalyptus, lavender, and peppermint oils are natural gnat repellents. Mix a few drops with water in a spray bottle and apply it to problem areas. Not only will this keep the gnats at bay, but your home will also smell delightful!

Employ Fans and Screens

Gnats are weak fliers, and using fans to create air currents can make it difficult for them to maneuver. Additionally, installing window and door screens acts as a physical barrier, preventing these pests from entering your home in the first place.

Neem Oil Solution

Neem oil, derived from the neem tree, is an effective organic insecticide. Dilute neem oil with water and spray it on infested plants or potential breeding sites. This natural remedy disrupts the gnats' life cycle and discourages them from laying eggs.

Keep Your Kitchen Clean

The kitchen is a magnet for gnats due to exposed food and dampness. Wipe down countertops with Jumbo Microfiber Cloth, clean up spills promptly using Wowables®, and store fruits and vegetables properly. Keep your sink clean and dry, as gnats can thrive in the moist environment around drains.

Remove Standing Water

Gnats are attracted to standing water, so be vigilant in eliminating any sources of excess moisture around your home. Fix leaky pipes, change water in flower pots regularly, and empty pet water bowls when not in use.

Introduce Carnivorous Plants

For a unique and natural way to combat gnats, consider adding carnivorous plants to your indoor garden. Venus flytraps, pitcher plants, and sundews are fascinating and effective insect eaters, helping to control the gnat population.

Say goodbye to the frustrating gnat invasion with these eight clever strategies. By identifying the source of the infestation, creating DIY traps, utilizing essential oils, employing fans and screens, using neem oil, maintaining a clean kitchen, removing standing water, and introducing carnivorous plants, you can successfully banish these pesky intruders from your home. Embrace these natural and practical solutions, and soon you'll be able to enjoy a gnat-free environment once again. Happy gnat hunting!